Easy Crochet Santa Hat: Free Step-by-Step Pattern
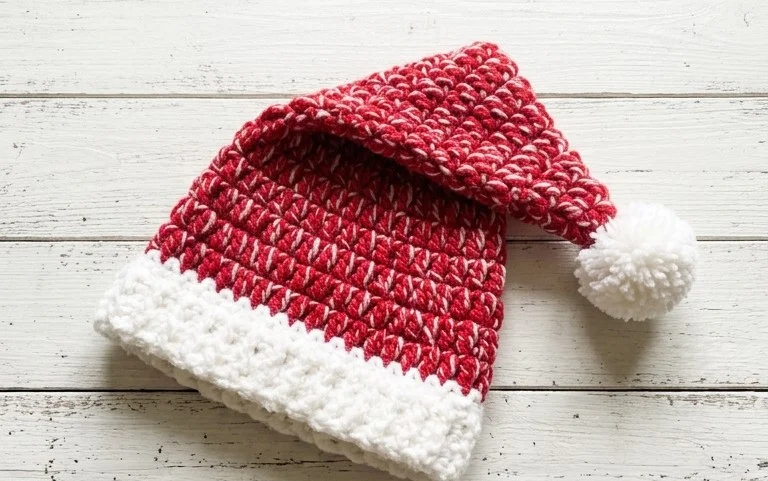
This classic red hat brings a sense of handmade nostalgia to every holiday gathering, sitting soft and snug against the forehead. Whether you are prepping for a school play or simply want a festive accessory for your family photos, this design works up quickly enough to create for every person at your dinner table. You will learn the slip stitch ribbed method, a technique that gives the fabric plenty of stretch without needing complicated circular increases. It is a rewarding project for anyone who enjoys seeing a flat rectangle transform into a cozy, professional hat in just a few hours.
Why You’ll Love This Pattern
This crochet ribbed beanie pattern utilizes a simple back-loop-only technique to create a stretchy, professional-looking garment that fits almost any adult head size. You can complete this project in a single evening, making it a reliable choice for last-minute gifts or charity donations. Because the fabric is worked flat as a rectangle and then seamed, you avoid the complexity of working in circular rows or managing complex stitch counts while in the round. The resulting texture is dense enough to provide warmth during winter months while maintaining enough drape to look stylish on various hair types.
I managed to finish this hat in just about three hours while watching a movie. The instructions were very clear and the ribbed texture looks much more complicated than it actually is.
— Sarah, hobbyist crocheter
Pattern Overview & Skill Level
- Skill Level: Beginner
- Approximate Time: 3 to 4 hours
- Construction: Worked flat in rows as a rectangle, then folded and seamed
- Finished Dimensions: 9 inches wide by 11 inches tall (laying flat)
Materials & Supplies Needed
- Yarn: Worsted weight (#4), wool or acrylic blend, approximately 200 yards.
- Hook Size: 5.5 mm (US I-9).
- Notions: Tapestry needle for seaming and weaving in ends, a locking stitch marker, and a pair of scissors.
- Safe yarn substitutions: You can use any worsted weight yarn, but avoid 100% cotton as it lacks the elasticity needed for a comfortable fit; 100% acrylic or wool-blend yarns will provide the necessary stretch to keep the hat on your head.
Stitch Guide & Abbreviations (US Terms)
- ch = chain
- sc = single crochet
- st/sts = stitch/stitches
- BLO = back loop only (inserting your hook only into the back loop of the V-shape of the stitch from the previous row)
- sl st = slip stitch
- turn = turn your work to begin the next row
Step-by-Step Pattern Instructions
Main Body Panel
- Row 1: Ch 41. Sc in the second ch from the hook and in each remaining ch across. (40 sts).
- Row 2: Ch 1, turn. Sc in BLO of every stitch across the row. (40 sts).
- Rows 3 through 60: Repeat Row 2 until the piece measures approximately 18 inches in length when pulled slightly. Ensure you maintain a consistent tension throughout to keep the edges straight. (40 sts).
- Finishing: Fasten off, leaving a 20-inch yarn tail for the seaming process.
Assembly and Shaping
- Fold the rectangle in half so that the short ends meet.
- Using the tapestry needle and the long yarn tail, whip stitch the two short ends together to create a tube.
- After reaching the top edge, weave the yarn in and out through the stitches along the top opening of the tube.
- Pull the yarn tail tight to gather the top of the hat, closing the gap securely.
- Tie a sturdy knot on the inside of the hat and trim the remaining yarn.
Care & Washing Instructions
- Hand wash your hat in lukewarm water with a small amount of mild wool detergent to maintain the fiber integrity.
- Gently press out excess water by rolling the hat in a clean towel, then lay it flat on a mesh drying rack away from direct sunlight.
- If the hat loses its shape over time, lightly steam it with an iron held several inches away, then reshape it by hand while it cools.
Pro Tips & Common Mistakes to Avoid
Maintain consistent tension by ensuring your slip stitches or turning chains are not pulled too tightly, as this will cause the edges of your hat to curl or shrink. Place a stitch marker at the very first stitch of every row to ensure you do not accidentally drop stitches at the end of the row, which is a common error that leads to a lopsided rectangle. Always weave your yarn ends back and forth through the stitches at least three times in different directions to ensure they do not come undone during washing. If you wish to adjust the size, simply add or subtract chains in the initial foundation row to change the height, or add more rows to increase the circumference, keeping in mind that each additional row will require approximately three more yards of yarn.
Frequently Asked Questions
Can I use a different yarn weight for this pattern?
While you can use a different weight, it will significantly change the size and drape of the finished hat. If you use a thicker yarn, you will need to reduce the number of starting chains to compensate for the added bulk.
Is this pattern suitable for someone who has never crocheted before?
Yes, this is an ideal project for beginners because it uses only two basic stitches—the chain and the single crochet—in a simple back-loop-only technique that introduces the concept of texture without complex increases or decreases.
Can I sell the hats I make from this pattern?
You are welcome to sell finished items made from this pattern, but please provide credit to the designer and do not use these specific instructions to create your own paid content or tutorials.
How do I know if the hat is the right size?
Before you sew the final seam, wrap the rectangle around your head. It should feel comfortably snug but not tight. If it feels too loose, you can unravel a few rows or increase your tension on the next attempt.
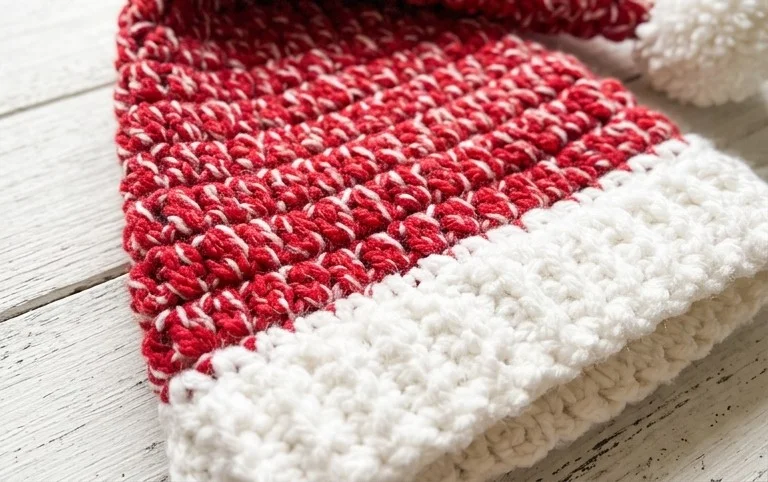
You now have a finished piece that adds a homemade touch to your winter celebrations and brings joy to anyone receiving it as a gift. If you want a different look, try using a chunky velvet yarn for a softer, more luxurious texture or add a large pompom to the top for extra character. Post a picture of your creation to share your work with our community and browse our blog for additional holiday projects you can start today to keep your needles busy.