Ring Stitch Beanie: Free Easy Beginner Crochet Pattern
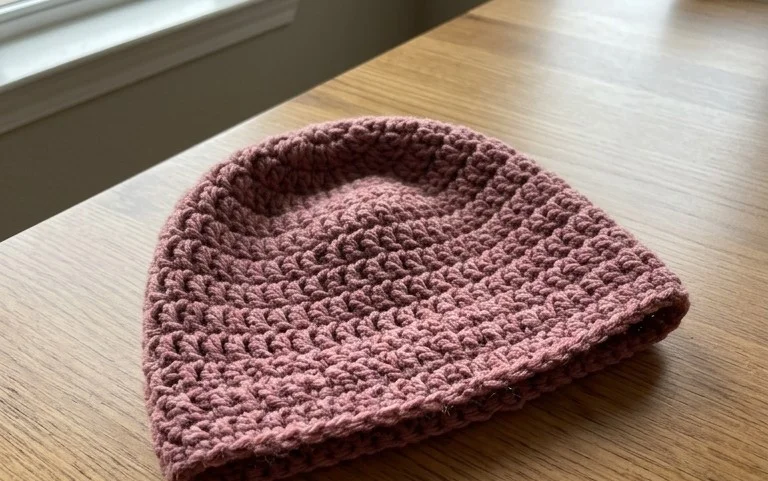
This snug beanie uses a repetitive ring stitch that creates a dense, squishy texture unlike standard flat caps. It sits firmly against the forehead, making it a reliable layer during windy autumn walks or chilly morning commutes. Beginners enjoy this pattern because it relies on simple counting and consistent tension rather than complex color shifts or intricate cabling. You will learn how to maintain a flat crown before transitioning into the vertical ribbing effect that defines this specific style. Crafting this hat feels rewarding because the yarn loops build up height quickly, resulting in a cozy accessory by the end of an afternoon.
Why You’ll Love This Pattern
The Classic Crochet Bucket Hat works up quickly using a single skein of medium-weight yarn, making it an ideal weekend project. Its simple, single-crochet construction provides a sturdy structure that holds its shape well throughout the day. Because the pattern relies on basic increases, it is easy to customize the crown diameter to fit any head size. The dense stitch pattern offers excellent sun protection, and the casual silhouette pairs easily with most summer wardrobes.
I managed to finish this hat in one afternoon, and the sizing instructions were spot on for my daughter who struggles to find hats that fit her comfortably.
— Sarah, hobbyist crafter
Pattern Overview & Skill Level
- Skill Level: Beginner
- Approximate Time: 3 to 4 hours
- Construction: Worked in continuous rounds from the center crown down to the brim
- Finished Dimensions & Sizing: Fits adult heads 21–23 inches in circumference
Materials & Supplies Needed
- Yarn: Worsted #4 weight, cotton or cotton-blend, approximately 200 yards. Cotton provides the best structure for hats.
- Hook Size: 5.0 mm / H-8
- Notions: Tapestry needle for weaving ends, stitch marker to track round starts, and a measuring tape.
- Safe yarn substitutions: Acrylic yarn is a soft alternative, though it may result in a floppier brim compared to cotton. Avoid wool blends if you intend to wear the hat in high heat, as they may be too warm and heavy.
Stitch Guide & Abbreviations (US Terms)
- MR: Magic Ring
- ch: Chain
- sc: Single crochet
- inc: 2 sc in the same stitch
- BLO: Back loop only
- sl st: Slip stitch
- st(s): Stitch(es)
Step-by-Step Pattern Instructions
Crown
- Rnd 1: Start 6 sc into a MR (6 sts)
- Rnd 2: Inc in each st around (12 sts)
- Rnd 3: Sc 1, inc repeat around (18 sts)
- Rnd 4: Sc 2, inc repeat around (24 sts)
- Rnd 5: Sc 3, inc repeat around (30 sts)
- Rnd 6: Sc 4, inc repeat around (36 sts)
- Rnd 7: Sc 5, inc repeat around (42 sts)
- Rnd 8: Sc 6, inc repeat around (48 sts)
- Rnd 9: Sc 7, inc repeat around (54 sts)
- Rnd 10: Sc 8, inc repeat around (60 sts)
Body
- Rnds 11–22: Sc in each st around. Maintain 60 sts per round. This section creates the vertical walls of the hat.
Brim
- Rnd 23: Sc 9, inc repeat around (66 sts)
- Rnd 24: Sc in each st around (66 sts)
- Rnd 25: Sc 10, inc repeat around (72 sts)
- Rnd 26: Sc in each st around (72 sts)
- Rnd 27: Sc 11, inc repeat around (78 sts)
- Rnd 28: Sc in each st around (78 sts)
- Rnd 29: Sl st in each st around to create a finished edge. Fasten off and weave in all ends securely.
Care & Washing Instructions
- Hand wash the hat in cool water using a gentle detergent to maintain the shape of the brim.
- Lay the item flat on a towel to air dry; do not hang the hat, as the weight of the water will stretch the fabric.
- Reshape the crown and brim while damp to ensure the hat sits properly once fully dry.
Pro Tips & Common Mistakes to Avoid
Consistent tension is the most important factor for a uniform hat, so ensure you pull your yarn with the same force on every stitch. Use a locking stitch marker at the start of every round; this prevents you from losing your place in the spiral construction. Weave your yarn tails in at least three different directions through the back of the stitches to ensure they do not loosen over time. If you need to make the hat larger, simply continue increasing the crown until it reaches the desired diameter, but note that this will require additional yardage.
Frequently Asked Questions
Can I use a different yarn weight for this pattern?
Using a different yarn weight will significantly change the dimensions and gauge of the hat. If you use a lighter yarn, you will need to add more increase rounds to reach the correct size, whereas a thicker yarn may result in a hat that is too stiff.
Is this pattern suitable for someone who has never crocheted before?
Yes, this is an excellent starter project. It uses only the single crochet stitch and simple increases, allowing you to practice maintaining even tension without the complexity of changing stitch patterns.
How do I adjust the hat to be smaller or larger?
To adjust the size, stop increasing the crown sooner for a smaller head or continue for one or two additional rounds for a larger head. Ensure you maintain the correct total stitch count for the body section to match your new crown size.
Am I allowed to sell hats I make from this pattern?
You are welcome to sell finished items created from this pattern. I only ask that you credit the designer and provide a link to the original tutorial on your product listing.
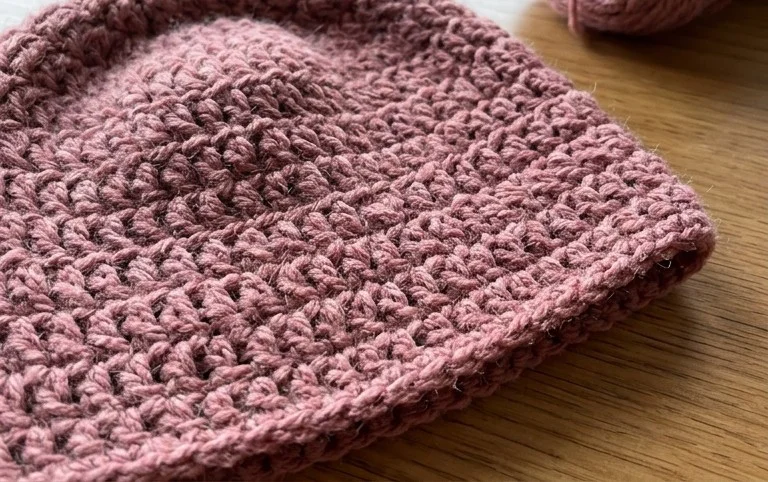
Your finished hat should have a snug fit that keeps your ears warm throughout the coldest months of the year. Consider holding two strands of yarn together if you want an extra bulky look that works up even faster for gift-giving projects. Please post a photo of your finished work on social media so others can see your color choices. I enjoy seeing how these stitches look in different shades of wool. You are welcome to browse the rest of my site for more free patterns to fill your weekend sewing basket.