Free Crochet Adult Bear Hooded Scarf Pattern for Beginners
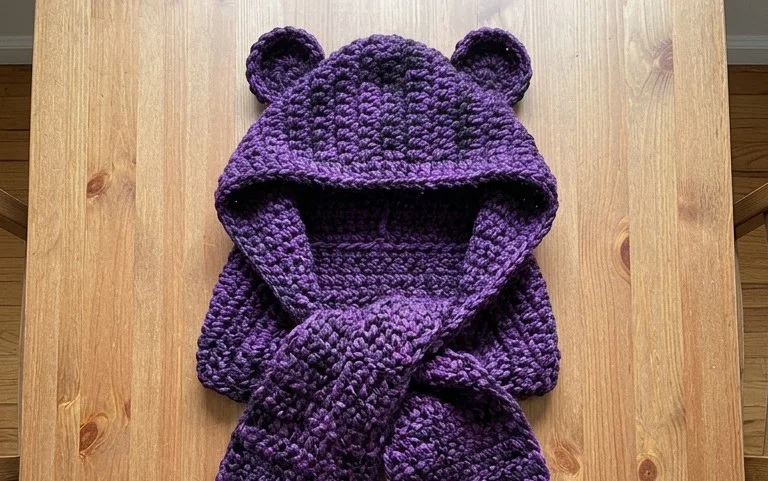
Soft, oversized hoods with rounded ears offer a cozy shield against biting winter winds while adding a playful touch to your outdoor wardrobe. This project combines the warmth of a scarf with the convenience of a cowl, resulting in a thick, squishy fabric that rests comfortably on the shoulders without slipping. It is a fantastic build for anyone wanting to practice half double crochet stitches while creating a functional garment that stands out from standard winter accessories. By following this straightforward guide, you will master the simple construction needed to shape the hood and ears for a polished result.
Why You’ll Love This Pattern
This classic crochet beanie provides a snug, insulating layer for winter weather using a simple ribbed construction. The project relies entirely on half double crochet stitches worked in the back loops, which creates a flexible fabric that mimics the appearance of hand-knitted ribbing. Because the hat is worked as a flat rectangle and then seamed, it is an ideal project for those who are just beginning their journey with shaping and garment assembly. You can finish this hat in a single evening, making it a reliable choice for last-minute handmade gifts.
I managed to finish this hat in just a few hours on a Sunday afternoon. The instructions were very easy to follow and the finished result fits perfectly.
— Sarah, casual crafter
Pattern Overview & Skill Level
- Skill Level: Beginner
- Approximate Time: 2 to 3 hours
- Construction: Worked flat in rows to create a rectangle, then seamed along the side and gathered at the top.
- Finished Dimensions: 18 inches circumference (unstretched) by 9 inches tall, fits most adults.
Materials & Supplies Needed
- Yarn: Worsted weight (#4), wool or acrylic blend, approximately 200 yards.
- Hook Size: 5.5 mm (US I-9).
- Notions: Tapestry needle, locking stitch markers, measuring tape, and scissors.
- Safe Yarn Substitutions: Any standard worsted weight yarn will work. Using a 100% cotton yarn will result in a heavier, less stretchy hat, while an acrylic blend will provide the best elasticity and heat retention.
Stitch Guide & Abbreviations (US Terms)
- ch = chain
- hdc = half double crochet
- BLO = back loop only (insert hook under the back loop of the stitch instead of both loops to create ridges)
- st/sts = stitch/stitches
- sl st = slip stitch
- FO = fasten off
Step-by-Step Pattern Instructions
Hat Body
The hat is worked in rows. You will create a rectangle that measures 18 inches by 9 inches.
- Row 1: Ch 35. Hdc in the third ch from hook and in each remaining ch across. (33 sts)
- Row 2: Ch 2, turn. Working in BLO, hdc in each st across. (33 sts)
- Rows 3–50: Repeat Row 2 until the piece measures 18 inches in length when laid flat.
Assembly and Finishing
- Fold the rectangle in half, bringing the short edges together.
- Using a tapestry needle and a long tail of yarn, seam the two short ends together using a whip stitch to form a tube.
- Weave the yarn in and out of the stitches along one of the open edges of the tube.
- Pull the yarn tail tight to gather the top of the hat closed. Secure with a knot.
- Turn the hat right side out and weave in all loose ends securely.
Care & Washing Instructions
- Hand wash your finished hat in cool water with a mild wool-safe detergent to maintain the integrity of the fibers.
- Lay the piece flat on a clean towel and roll it to remove excess moisture; never wring the fabric.
- Reshape the hat while damp and allow it to air dry away from direct heat sources.
Pro Tips & Common Mistakes to Avoid
Maintain consistent tension throughout the project to ensure the ribbing looks uniform. Because this is worked in rows, loose tension on the turning chains can leave noticeable gaps at the edges of the hat. Always use a stitch marker at the start of your rows if you find you are accidentally dropping stitches at the end of the row, as this is the most common reason for uneven edges. To adjust the size, simply increase or decrease the initial starting chain to change the height, or add more rows to change the circumference. Keep in mind that adding width will require additional yardage beyond the stated 200 yards.
Frequently Asked Questions
Can I use a larger hook for this pattern?
Using a larger hook will make the hat fabric looser and more open. This will increase the overall size of the finished hat but may result in less warmth.
Is this project suitable for complete beginners?
Yes, this pattern uses only one basic stitch. If you know how to chain and half double crochet, you have all the skills necessary to complete this project.
How do I make the hat larger for a slouchy fit?
To create a slouchier look, increase your starting chain by 5-10 stitches. This will add height to the hat, allowing it to hang down at the back when worn.
Am I allowed to sell hats made from this pattern?
You are welcome to sell finished items created from this pattern. I only ask that you credit the design and do not distribute the written instructions themselves.
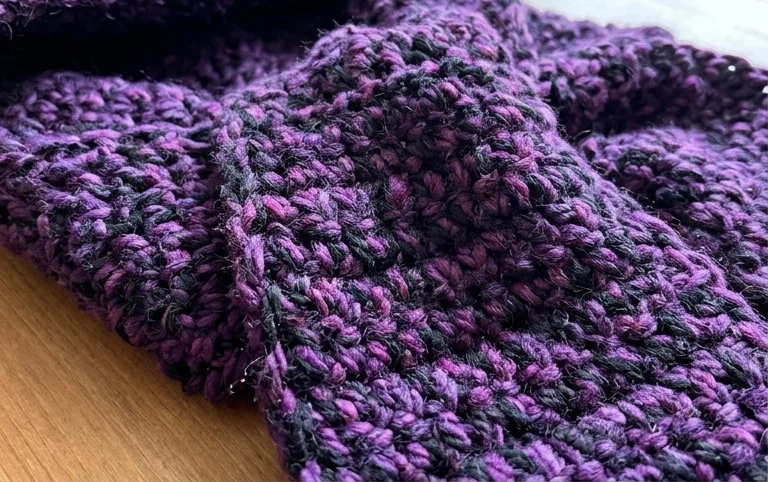
Your new bear-themed hooded accessory will keep you warm through the coldest months of the year with its thick, insulating stitch pattern. You can change the aesthetic by choosing a fluffy faux fur yarn for the trim or opting for a monochromatic grey wool for a more subtle, mature style. Sharing a photo of your finished work on Instagram or local maker groups connects you with other creators who enjoy similar projects. Visit the main pattern index on our blog to discover additional seasonal designs you can finish in a single afternoon.